Wednesday, February 29, 2012

Vintage Kitchen Cart Makeover

I love Kitchen Carts!

I remember them from my childhood when they were a fixture in most kitchens. They provided additional storage for small appliances and often held the toaster ovens of that time. I see them pretty often at yard and estate sales but they are rarely in good shape. Due to their age and utilitarian nature, they often have rust and paint damage. You might be turned off, thinking they are shot and too rustic to be useful but let me encourage you to give them a second look. Here's one I'd like to show you as I transform it from ugly duckling to beautiful swan.


Here is the Kitchen Cart I bought.


I loved the curved handles and it was in fairly good shape, with just some minor rust.


I took it apart and got to cleaning. I used a brillo pad to clean off years of grime and attack the rusty spots. Once the clean up was done, I started the spray painting. I used Rust-Oleum Ultra Cover 2X Gloss Apple Red. This type of paint is really great for this application. 


I caution you to apply many light coats rather than one or two heavy coats. You'll get better coverage and less chance at drips or crazing. 


 Coat # 2
Subsequent coats

I do sweeping motions from one end to the other at about 10-12 inches from the surface. It takes time but its well worth it if you don't rush it. Because I was using red, it took about 1 1/2 cans of the paint to get a nice even finish. I let it cure for at least 24-48 hours before reassembling it. 


Here is the finished project! I love it and for under twenty bucks, it looks like its new again!


Rust-Oleum comes in dozens of colors so you are sure to find one that works for you. It is an easy to do project, even for beginners, and you'll end up with a useful piece of nostalgia! 
Start spraying!

Sunday, February 26, 2012

Painted Art Deco Waterfall Wardrobe

Perish the thought, but, in the 1920's and 1930's homes did not have closets.
Can you imagine?
People didn't have elaborate amounts of clothing that required walk-in closets 
and homes did not typically have closets built in.
The solution was the piece of furniture known as the wardrobe.

Wardrobes came in many shapes and sizes. In the 30's, Art Deco was king. I am particularly fond of the Art Deco Waterfall style. The Waterfall style is characterized by a rounded front on top of the furniture piece mimicking a waterfall. 

Typically, waterfall pieces are veneered. Because it is veneer, you will often see damage on the pieces you find at yard sales or estate sales. Stripping and refinishing is tricky because if you strip and sand it, you might go right through the thin veneer and get down to the base wood.

So what if you like the style and form of the piece but it is damaged and can't be re-stained? What if your style is sleeker and more modern? How about painting it!

I see a lot of old waterfall furniture that is painted. You've probably seen pieces in magazines painted off white or cream and turned into beautiful "shabby chic" pieces. You also see lots of them used in "cottage" design. I like the way they turn out but, for me, Deco should be sleek and the shabby chic and cottage look just don't work for me.

What to do, what to do! For me, it is to go black. Not shiny gloss but an eggshell finish of black. Eggshell finish is not totally flat but also not like a high gloss finish. If you go to the paint department of your local paint store or Home Depot or Lowes and ask them to show you the different finishes they have available you'll see the differences and then you can pick what you like. For me, it is always eggshell when I paint furniture.

Right about now, purists are screaming at their computer screen and pulling their hair out . How can you "paint" furniture? That ruins the value and integrity of the piece. Well, they are right. If you start with a piece that is pristine and valuable, painting it will ruin its value. But if you are starting with a piece that is not in the greatest shape and you are not purchasing it to preserve it as an investment or it is not a family heirloom, then whats the problem? I would never paint a piece of waterfall deco furniture that is in mint condition and I have many in my home that are original. They were mass produced and don't carry high values but I love them in their original finish and thats all that matters. But when I come across a piece that is in rough shape, painting is the way to go.

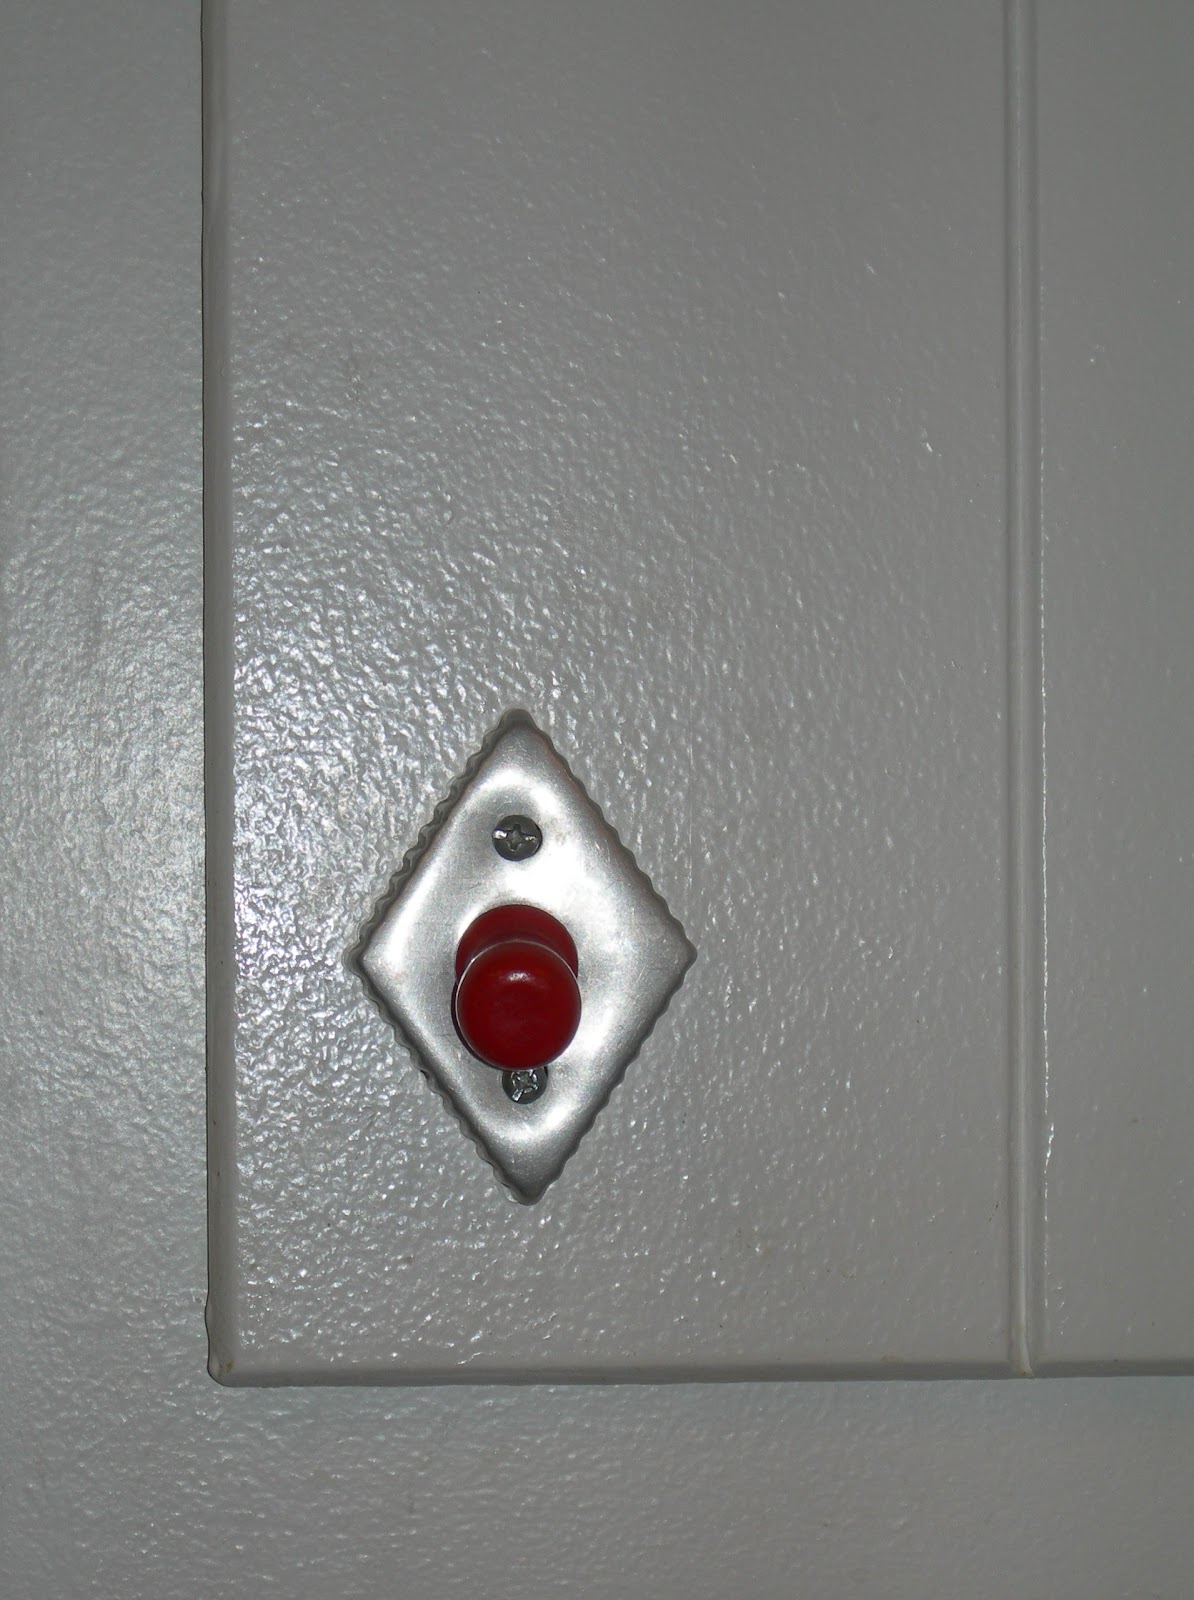
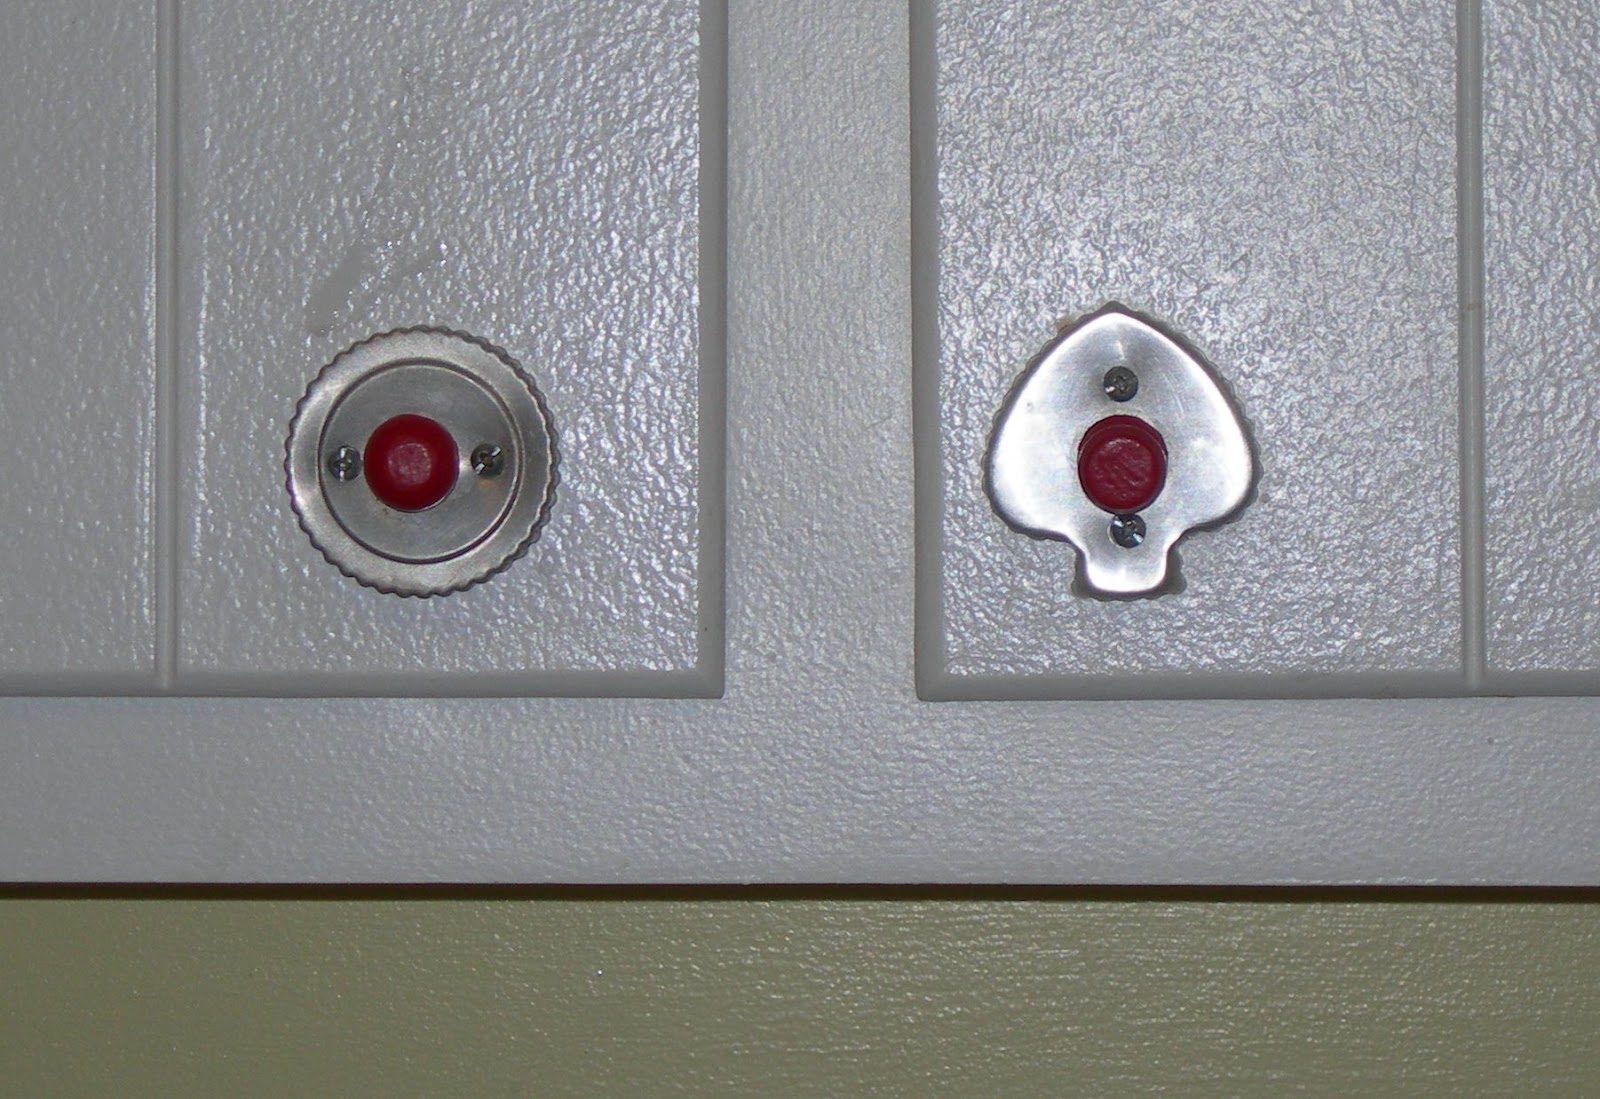
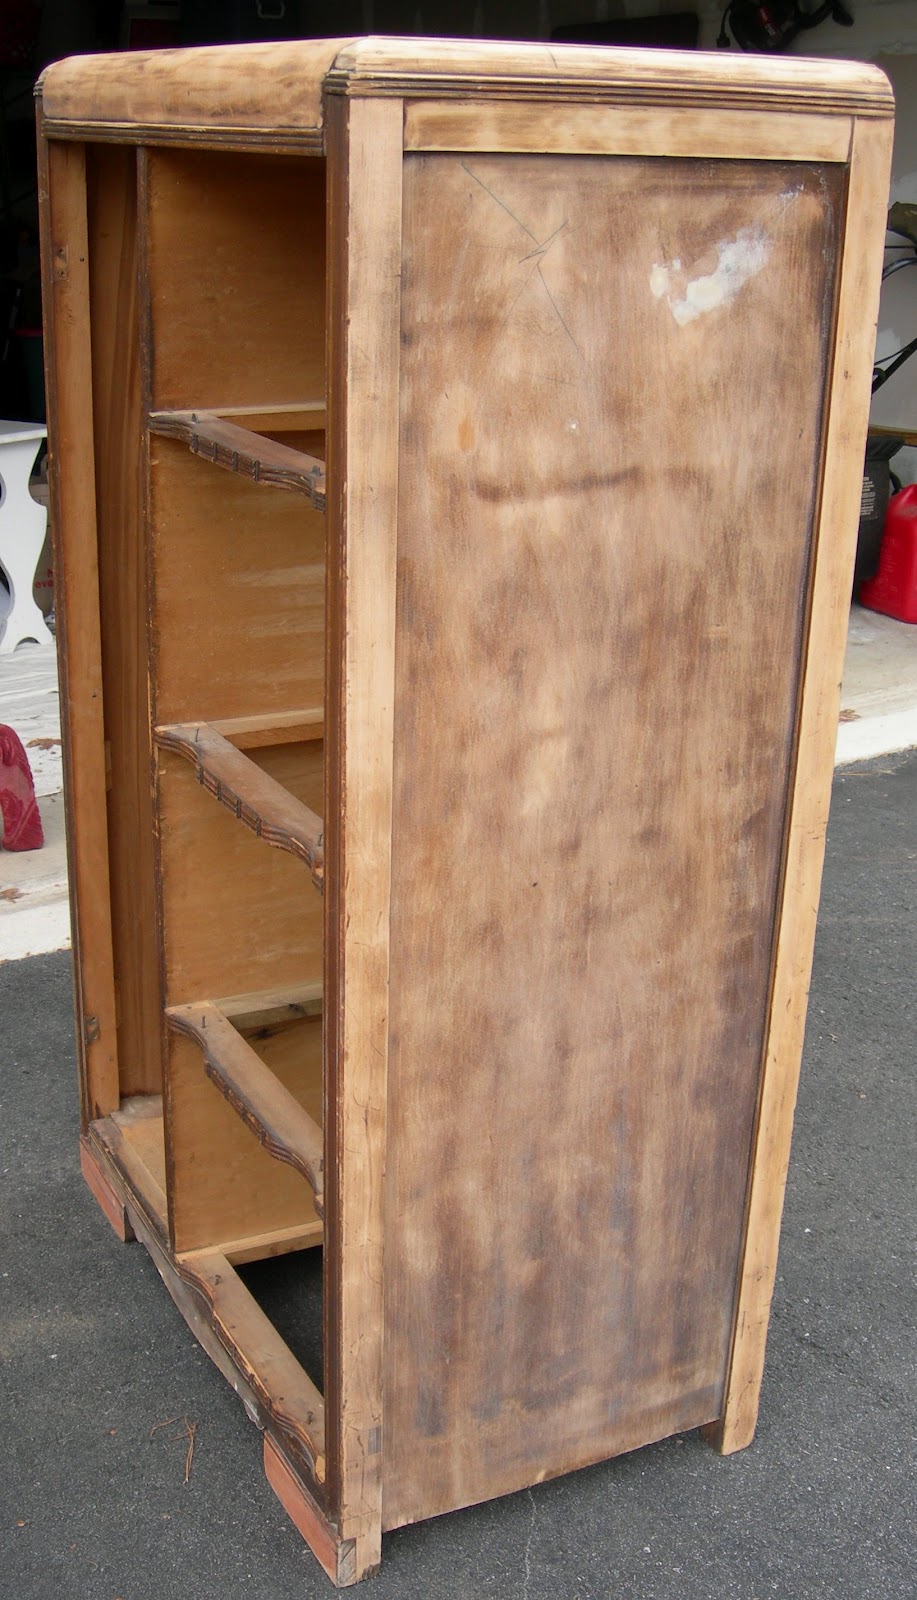
Here is my deco waterfall wardrobe project. 
I paid $25.00 for this wardrobe at a yard sale. 


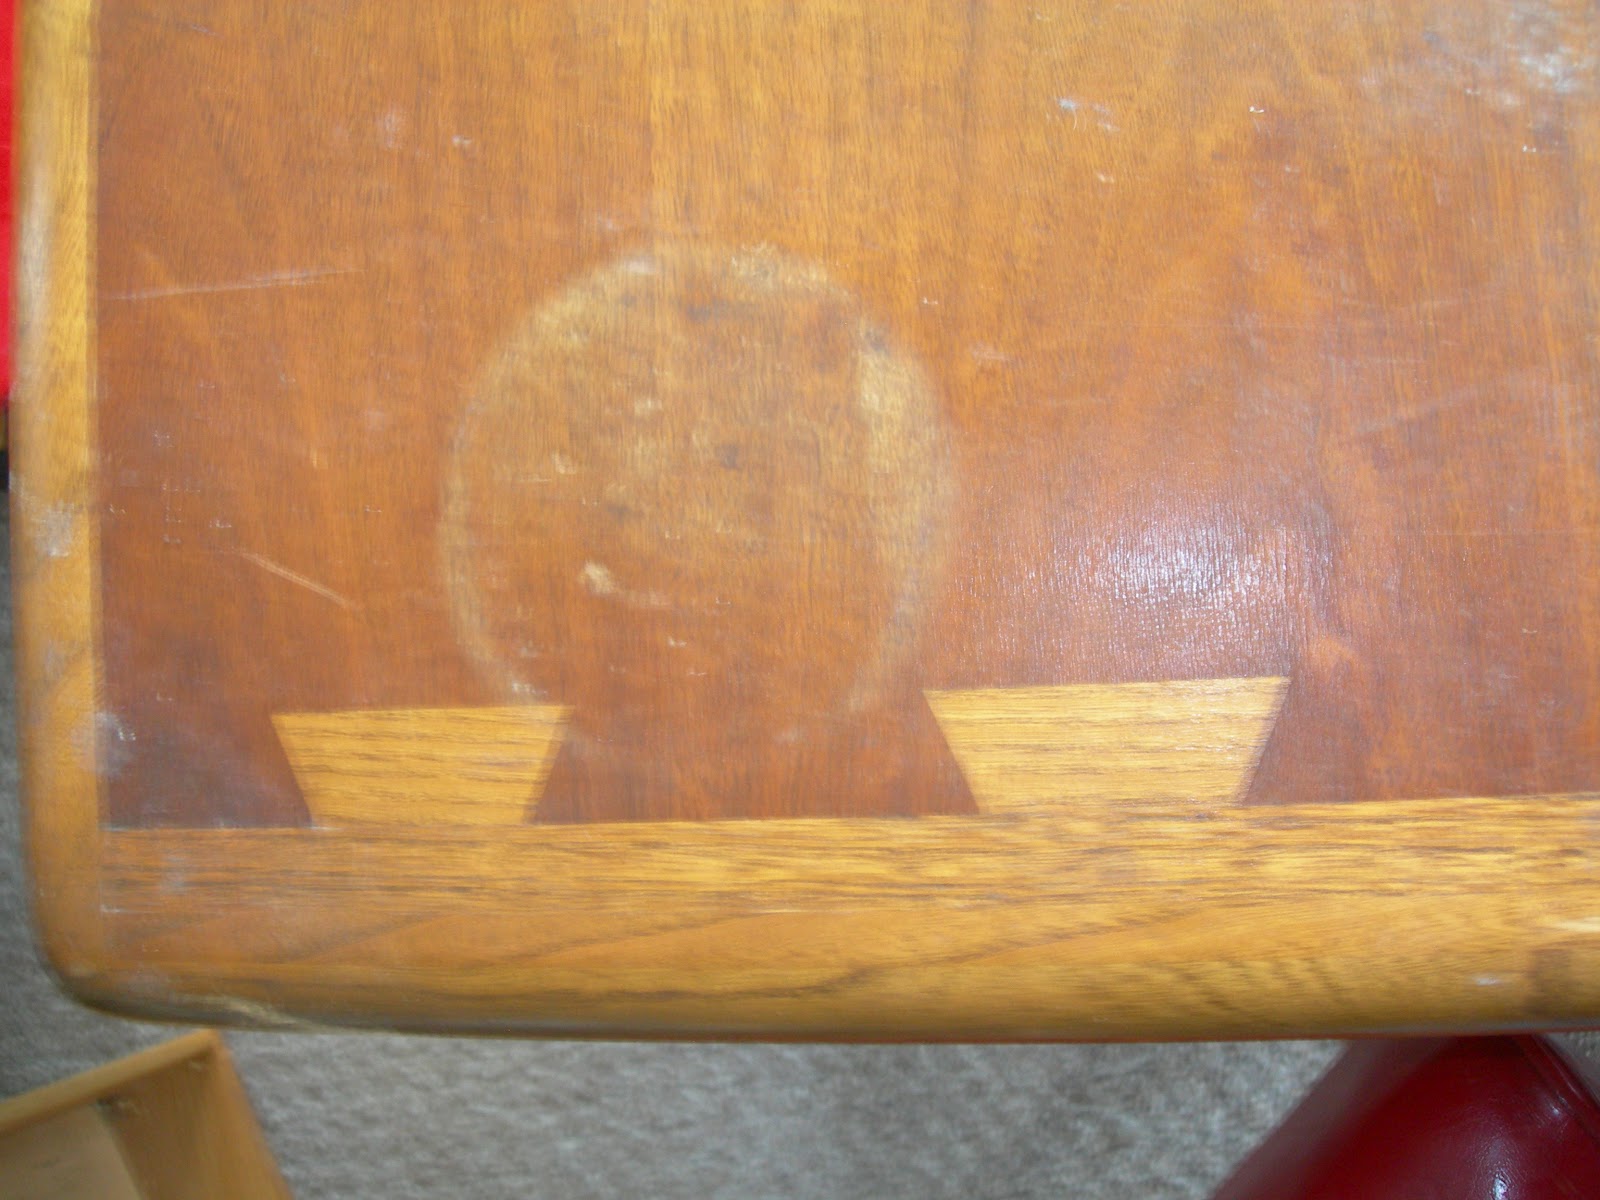
As you can see, it has water stains on top, someone carved their name into it 
and generally it is in rough shape. 


I took it apart, re-glued the drawers to tighten them up, 
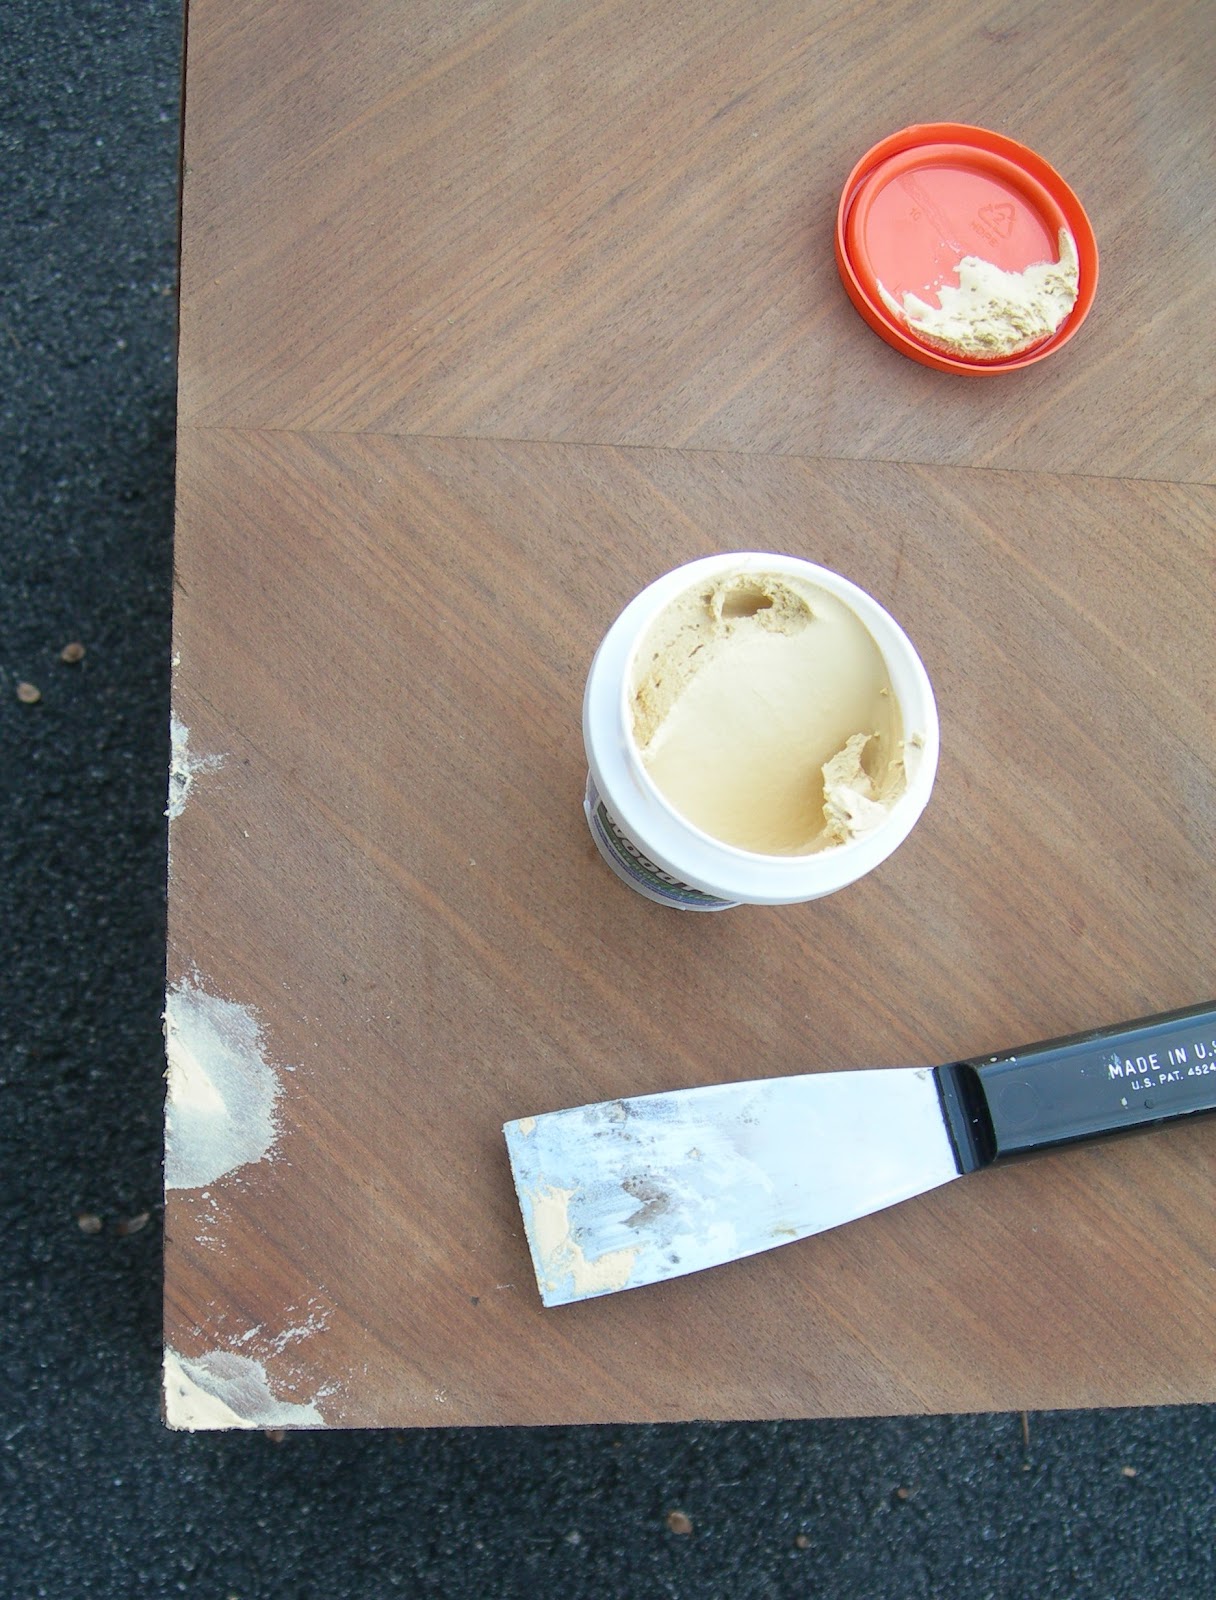
puttied the breaks in the veneer and sanded it all. 
I am lazy so I have a hand held Black and Decker Mouse sander. If you don't have a mouse sander, you can go old school and use regular sand paper or steel wool. Either way, go easy so you don't sand all the way through the veneer and damage the piece more.

Once the piece is sanded, it is important to clean it off completely before you paint it. First, start by sweeping it off with a soft hand broom. The very fine dust from sanding can really ruin your paint job if you don't get it off the piece so I use tack cloth to really clean it well before painting. Tack cloth is sticky cheesecloth and is really great to make short work of cleaning you project. Once you've cleaned it all off and cleaned your work area, you are ready to paint!


Your paint might come with a primer mixed in and that is the quick way of priming and painting. If you don't have primer in the paint, then you might want to prime the piece. It will help the paint stick better and last longer. I had my primer tinted so that it would be darker instead of white making it easier to cover the primer with the black paint.
Coat number one. Painting involved two coats to get even coverage.
Here it is completed!
I took this $25.00 yard sale find from trash to useful treasure. If you find a piece of furniture with a finish that has seen better days, painting can be the way to go to bring it back to life. Don't be afraid to try it - you might have fun and feel really good about your accomplishment!


Tuesday, February 21, 2012

Laissez Le Bon Temps Roulet !!!

Happy Mardi Gras! 


Yes, it's Fat Tuesday and that means it is the last chance to "Let the Good Times Roll" before the austere season of Lent. 


Unless you've been under a rock your entire life, you know that this day is THE big day in The Big Easy, The Crescent City, NOLA, or just plain Nawlins'. 


If you've ever had the pleasure of cafe au lait and beignets at Cafe Du Monde or a colorful King Cake from Gambino's Bakery you are lucky. If you happen to be in New Orleans for Mardi Gras right now, you're more than lucky!


But if, like me, you're stuck at home in the cold of winter instead of down in Louisiana, why not bring a little Mardi Gras into your home? Purple, green and gold, the colors of Mardi Gras, are plentiful and easy to put together for great decorations to bring the Big Easy to your home. How about a festive wreath? Check out http://blog.mardigrasoutlet.com/2011/02/mardi-gras-wreath-ideas-one-wreath.html for a great tutorial. They also have other ideas for centerpieces and great recipes for a Mardi Gras festivity. 


How about repurposing a Christmas tree for a table scape? That's what I've done! Here's a look. 
After Christmas, I purchased this little 2 foot purple tree at 50% off ( 9 bucks) and I picked up a bunch of glittery purple, green and gold items. 


I gathered my glass balls of the right colors before I put all the Xmas stuff away and I used some cheap plastic Mardi Gras Beads along with my prized Krewe of Aquila necklace as garland. A plastic Crown surrounds the base of the tree and we are ready! 


Now all we need is America's first cocktail, born in New Orleans, the Sazerac, and we're ready to Laissez Le Bon Temps Roulet !!! 


Who Dat?


Thursday, February 16, 2012

Mid-Century Mod Metal Mesh Magazine Table

There are many different varieties of mid-century metal mesh tables, shelves, and magazine racks and they are relatively inexpensive to pick up at estate or yard sales. I picked up this table with a magazine shelf at a yard sale for a couple of bucks. It was rusty and in need of a face lift but that would be no problem at all.


Have I mentioned that I love spray-paint? 
It is the quickest, easiest way to accomplish a furniture re-do! 


These metal mesh items are super easy to spray paint. I brushed off the dust and cobwebs, used a metal scrub brush to remove the rust, wiped it down and got to spray painting!

I am particularly fond of RustOleum Ultra Cover 2X spray paint. It really does a great job. You can buy cheaper paint but you really get what you pay for and this stuff is well worth it. 


I like to do a couple of light coats to avoid drips. I'm just as impatient the next guy so using the RustOleum Ultra Cover 2X is a great choice because it is fast drying. 

 Here is the transformation! 

This was a quick afternoon project. 
It reminded me just how much I love spray paint.
Oh, and instant gratification - I love that too!

Tuesday, February 14, 2012

Happy Valentine's Day!

It's February 14th so most people are thinking fondly of that special someone. 
Sure, I'm doing that too but I am also thinking about gardening and spring! 
The reason for my premature thoughts? 
This patch of little springtime surprises!


It has been an incredibly mild winter In Richmond, Virginia and all the plants are confused! We have bulbs poking up everywhere and birds returning to our yard. This has me thinking of plants and yard work. I adore digging in the dirt and watching the fruits of my labors.

I am a huge fan of perennials. I think the bang for the buck is obvious. I have many different types and I'll blog about them as they show themselves this spring.

I would just like to make one suggestion for you to think about now as you plan your springtime planting. In two words, Japanese Maples. I have three, two in the backyard and one in the front yard. I took a few pictures of them because their beauty in the spring is not all they are about. Their form is beautiful in the winter as well as you can see here. They have a lovely shape and you can trim them to your liking.


They are not inexpensive trees and they are slow growers. I have gotten them as little twigs and they have grown over many years to their current sizes. They are well worth it and their foliage and form makes them beautiful at all times of the year, even on Valentine's Day along with some surprise Daffodils!

Happy Valentine's Day to you and yours!

And please hurry up spring!
I'm ready!
How about you? 

Sunday, February 12, 2012

KITSCH'N IDEAS: Cookie Cutter Cabinet Pulls

My friend's Grandmother was one of those old school Grandmothers who had freshly baked cookies for the grandkids when they came in the door. After she passed away, my friend got a bag full of cookie cutters that belonged to her Grandmother. After moving them from place to place and knowing my love of vintage stuff she offered them to me. That's when the creative juices started to flow.


I was updating my "1970's Harvest-Gold-Appliances-throw-back-kitchen" using items from the 50's to set the tone when I got the cookie cutters from my friend. I repainted the cabinets from a dark stain to a crisp white, and replaced the countertops and the old harvest gold appliances. I got some red vinyl chairs and a formica top table, an assortment of retro canisters and a whole bunch of kissing salt & pepper sets for display.


Once the cabinets were done, I wanted to replace the pulls and that is when it hit me! What better to use than the cookie cutters! So, off I went drilling and attaching my adorable cookie cutter pulls! I love the vintage touch it adds to my kitchen and I especially love that they have such meaning to me. My friend's Mom came for a visit to see the kitchen re-do and she was overwhelmed with happiness to see the repurposed cookie cutters on full display.


My cookie cutters are very special to me. If you don't have any that were passed down in your family you can certainly buy them at yard sales, estate sales or antique shops for a couple of bucks apiece.

Have any other ideas for cookie cutters?
I do!
Stay tuned for more on repurposing vintage cookie cutters!


Saturday, February 4, 2012

Removing White & Black Rings From Furniture

I found this square Lane Acclaim table and I could not pass it up! 

But take a look at the top of this table - what a mess!


The stains did not deter me because it is a Lane Acclaim table and by now you know how much I love Lane Acclaim Furniture!
I'd like to discuss water rings and the differences in them. You can see in the picture that there are white looking marks and a dark black ring stain - lucky me!
Water or steam rings can be divided into two groups: White rings and black rings. They are both caused by water or steam from placing something wet or hot on the table. 

The white rings appear when moisture is trapped in the finish. That's the easy one to deal with. If you check the internet, you will find that you can steam the rings out using a white cloth and your iron. I know it seems counter-intuitive but it really does work! There are also other methods that involve mayonnaise or lemon oil although I have only done it with the iron method. It really does work so don't be afraid if that is the kind of stain you have on your finish.

Removing the black marks is more challenging because they are actually a stain that goes through the finish all the way down to the wood. If you have a real "antique" or a cherished family treasure, I would recommend getting it done professionally. Refinishing a valuable antique can lower its value so you certainly want it done right!
To remove the black mark, I will be stripping the table of its finish so I can get right down to the wood. Then I will treat it with oxalic acid, a wood bleaching agent and sand it until it is gone. Finally, I will re-stain and add new finish to the top. This is the same process I used on the Lane Surfboard table I posted earlier and it came out great. Stay tuned to see how this ugly duckling turns into a beautiful swan! 
Wish me luck - I'll keep you posted!