I haven't posted in a few days because I've been busy working on this
little gossip bench project!
What do you think? I am very happy with it.
A quick history: The "gossip bench", sometimes referred to as a telephone table or telephone bench, consists of a seat and a small table the phone rests on.They were made of many different materials and in many styles. The "gossip bench" got its name because people sat on the bench and "gossiped" on the phone. During the 50's and 60's gossip benches were all the rage.
Today, vintage gossip benches are plentiful and available at reasonable prices. If you are willing to do a little work, you can really get a deal on a gossip bench that is not in great shape and you can make it blend with your decor and style. Gossip benches are still a great place to sit and chat on the phone but they can also serve many other functions. With such a small footprint, a gossip bench can work well in a variety of places. In an entry foyer, its a great place to drop your purse, mail, keys etc. Instead of an old school phone, a gossip bench can be an ideal place to set up your cell phone docking station. The possibilities for incorporating a gossip bench into your decor are limitless!
Now, my gossip bench re-do!
You know that you'd need to clean, prime & paint the metal so I won't bore you with all that!
You know that you'd need to clean, prime & paint the metal so I won't bore you with all that!
Making the seat:
I have the plywood base, a layer of air filter mesh, foam and the black muslin I am using for the under layer of the upholstery.
I have the plywood base, a layer of air filter mesh, foam and the black muslin I am using for the under layer of the upholstery.
The key to getting this done properly is to stretch the fabric and staple as you go.
Getting the corners done right is a matter of stretching, gathering, smoothing and stapling.
If you mess up (and I do a lot!), just pull the staple out and have a mulligan!
This first layer of fabric is called the "underwear".
In upholstery world, it is designed to give the seat a complete wrapping
before putting on the final fabric.
If you want to change out the fabric later on, you can take the fabric off down to this layer
and then just add new fabric.
Adding the final fabric and working on the corners
until It looks a lot like a package!
Next, covering this bottom with the black muslin to make it look neat.
This step hides a lot of sins!
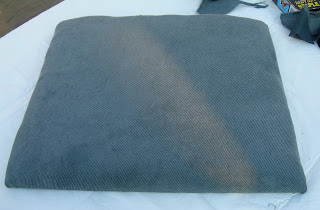
Here is the finished seat!
I bought these little strap clips to attach the wood bottom to the metal on the bench.
I used four and it is very secure.
Here it is, assembled and ready to use!
I bought it at the Goodwill auction for 5 bucks. Altogether, I spent another 10 bucks on wood, fabric and supplies to build the upholstered seat. For 15 bucks and a few hours of my time, I've got my 60's gossip bench!
In the foyer, ready for a call or to hold a purse or to keep track of my keys!
Do you have a place for a gossip bench?
Then get one and get started on your Gossip Bench Re-do!
Enjoy!
.JPG)


I have a gossip bench in my storage room- it was left by the previous owner. It's painted silver & has a cute print fabric on the seat. I have no space or interest in it. I'll have to take a picture- maybe you can sell it for me?
ReplyDelete-Mary W.
Take a picture and let us know! Happy Sunday Mary!
Delete