Showing posts with label mid-century. Show all posts

Saturday, March 31, 2012

50's Blond Sewing Box Gets Re-deaux

I came across this sewing box from the 50's. It was stained "Blond" which was very typical of 50's furniture. I saw the potential to reinvent this piece into an end table with lots of storage so I took off repurposing it. Here's how I did it:


I took off the knobs and began the sanding process to remove the finish.


Love my Black & Decker Mouse Sander!


Once everything was sanded, I used KILZ 2 tinted primer to get started.


I chose to paint it black and white so I painted the body with Eggshell Black from the Home Depot.


After two coats of paint, the body was done.


In order to turn this into an end table, I needed to add legs. I found these very 50's style legs at a yard sale and went onto priming & painting mode.


Notice the plates that hold on the legs. You can put the legs in straight (example on right) or at the angle (example on left) you often see in 50's style furniture.


I used Zinsser 1-2-3 Spray Primer on the legs since you can paint right over the finish without sanding at all! Great step saver. Notice I covered the leg tips with tape so I could repaint them silver later on to match the knobs.
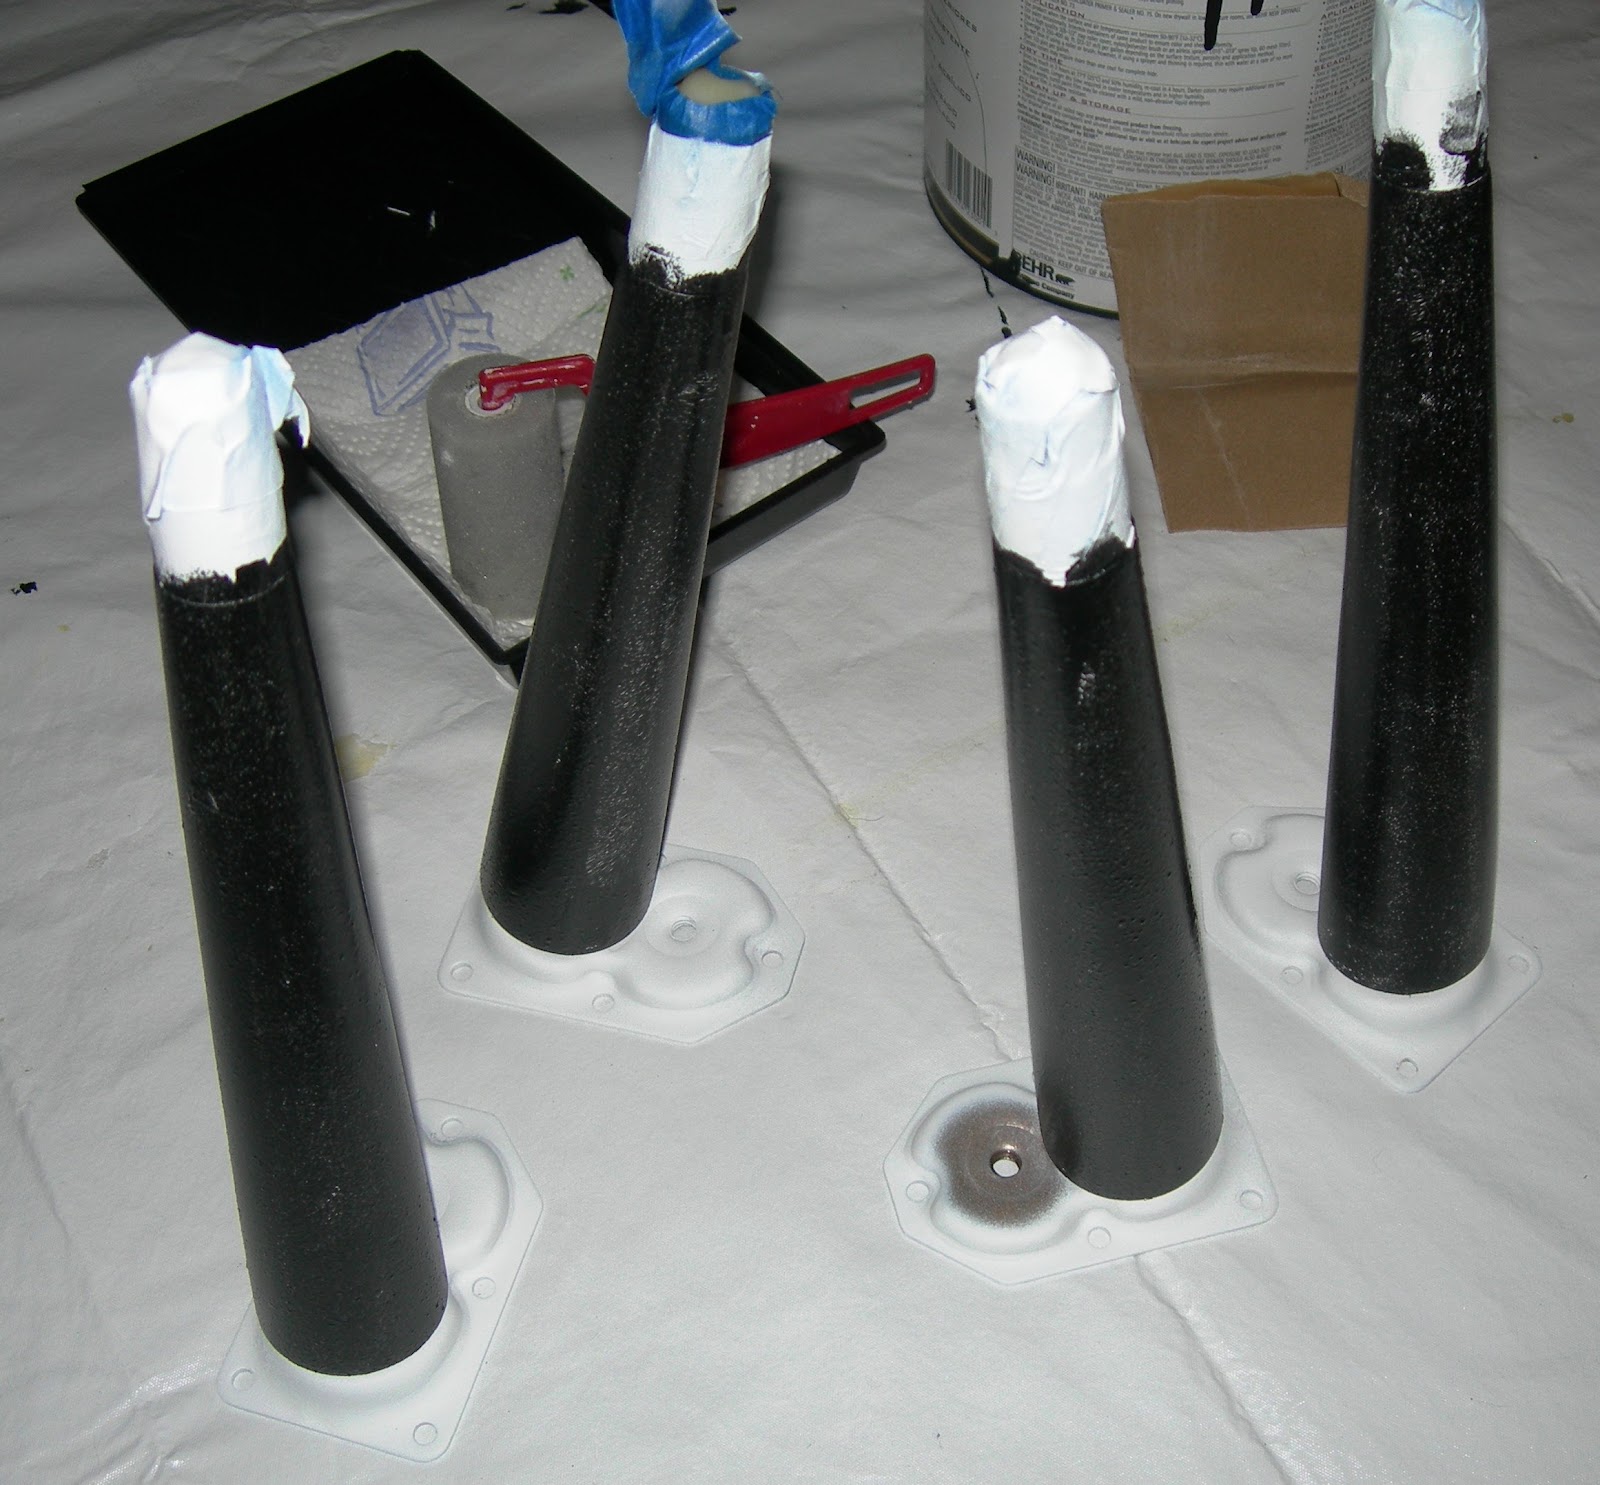

Here are the legs painted and ready to do the tips.


I took the knobs and screwed them into a piece of wood to hold them while I painted them.


I used Rust-oleum bright silver metallic finish (Can't see the cap color in the picture but it is silver!).


I sprayed the knobs and the end caps of the legs and let everything dry while I gave the drawer fronts two coats of white paint.


Here is the finished product!


BEFORE
AFTER

If you find an interesting piece but can't use it as is, consider repurposing it by adding to it and changing its purpose! 

Sunday, March 4, 2012

Lane ® Acclaim 2 Tier Table

As I've mentioned before, I have a passion for mid-century modern furniture, specifically, Lane ® Acclaim Tables. The Acclaim series of furniture from the 1960's was made in Altavista, Virginia. Its dove tail detail is timeless and the two-tier end tables are automatically associated with mid-century design. 

Here's the journey of reclaiming one I found!
I started by using a lift off varnish remover to get back to the raw wood. 
I painted on the varnish remover and let it sit as directed.
I used a plastic drywall knife to scrape the varnish remover off.
After all the varnish remover was taken off, I used OOOO steel wool to smooth the surface.
Next, I added the stain. I used a Min-wax cherry stain.
 Finally, I applied a satin finish paste wax.
The results are just beautiful, don't you think? 

Once again, a Lane ® Acclaim table back to its original beauty!


Lane ® is a registered trademark of The Lane Company, Inc., Altavista, VA, USA.                                         This post has not been authorized or endorsed by The Lane Company. 

Wednesday, February 29, 2012

Vintage Kitchen Cart Makeover

I love Kitchen Carts!

I remember them from my childhood when they were a fixture in most kitchens. They provided additional storage for small appliances and often held the toaster ovens of that time. I see them pretty often at yard and estate sales but they are rarely in good shape. Due to their age and utilitarian nature, they often have rust and paint damage. You might be turned off, thinking they are shot and too rustic to be useful but let me encourage you to give them a second look. Here's one I'd like to show you as I transform it from ugly duckling to beautiful swan.


Here is the Kitchen Cart I bought.


I loved the curved handles and it was in fairly good shape, with just some minor rust.


I took it apart and got to cleaning. I used a brillo pad to clean off years of grime and attack the rusty spots. Once the clean up was done, I started the spray painting. I used Rust-Oleum Ultra Cover 2X Gloss Apple Red. This type of paint is really great for this application. 


I caution you to apply many light coats rather than one or two heavy coats. You'll get better coverage and less chance at drips or crazing. 


 Coat # 2
Subsequent coats

I do sweeping motions from one end to the other at about 10-12 inches from the surface. It takes time but its well worth it if you don't rush it. Because I was using red, it took about 1 1/2 cans of the paint to get a nice even finish. I let it cure for at least 24-48 hours before reassembling it. 


Here is the finished project! I love it and for under twenty bucks, it looks like its new again!


Rust-Oleum comes in dozens of colors so you are sure to find one that works for you. It is an easy to do project, even for beginners, and you'll end up with a useful piece of nostalgia! 
Start spraying!

Thursday, February 16, 2012

Mid-Century Mod Metal Mesh Magazine Table

There are many different varieties of mid-century metal mesh tables, shelves, and magazine racks and they are relatively inexpensive to pick up at estate or yard sales. I picked up this table with a magazine shelf at a yard sale for a couple of bucks. It was rusty and in need of a face lift but that would be no problem at all.


Have I mentioned that I love spray-paint? 
It is the quickest, easiest way to accomplish a furniture re-do! 


These metal mesh items are super easy to spray paint. I brushed off the dust and cobwebs, used a metal scrub brush to remove the rust, wiped it down and got to spray painting!

I am particularly fond of RustOleum Ultra Cover 2X spray paint. It really does a great job. You can buy cheaper paint but you really get what you pay for and this stuff is well worth it. 


I like to do a couple of light coats to avoid drips. I'm just as impatient the next guy so using the RustOleum Ultra Cover 2X is a great choice because it is fast drying. 

 Here is the transformation! 

This was a quick afternoon project. 
It reminded me just how much I love spray paint.
Oh, and instant gratification - I love that too!

Sunday, February 12, 2012

KITSCH'N IDEAS: Cookie Cutter Cabinet Pulls

My friend's Grandmother was one of those old school Grandmothers who had freshly baked cookies for the grandkids when they came in the door. After she passed away, my friend got a bag full of cookie cutters that belonged to her Grandmother. After moving them from place to place and knowing my love of vintage stuff she offered them to me. That's when the creative juices started to flow.


I was updating my "1970's Harvest-Gold-Appliances-throw-back-kitchen" using items from the 50's to set the tone when I got the cookie cutters from my friend. I repainted the cabinets from a dark stain to a crisp white, and replaced the countertops and the old harvest gold appliances. I got some red vinyl chairs and a formica top table, an assortment of retro canisters and a whole bunch of kissing salt & pepper sets for display.


Once the cabinets were done, I wanted to replace the pulls and that is when it hit me! What better to use than the cookie cutters! So, off I went drilling and attaching my adorable cookie cutter pulls! I love the vintage touch it adds to my kitchen and I especially love that they have such meaning to me. My friend's Mom came for a visit to see the kitchen re-do and she was overwhelmed with happiness to see the repurposed cookie cutters on full display.


My cookie cutters are very special to me. If you don't have any that were passed down in your family you can certainly buy them at yard sales, estate sales or antique shops for a couple of bucks apiece.

Have any other ideas for cookie cutters?
I do!
Stay tuned for more on repurposing vintage cookie cutters!


Friday, January 20, 2012

Rewiring Vintage Lamps

I absolutely love retro vintage lamps. The funkier the better! 
I run across them all the time at yard sales and estate sales. 
There is only one problem: the wiring usually scares me! 


Even if the cord is not brittle, broken or compromised in some way, it scares me that there might be damage I can't see and it might cause a fire. I always, always, always rewire vintage lamps I buy. For about 8-15 bucks at any Home Depot or Lowe's (or cheaper if, like me, you buy them at estate sales or garage sales in unopened condition for even less!), you can purchase an entire kit to change out the wiring and make the lamp safe to use!


If you have never rewired a lamp, you might think you are in way over your head. Don't be intimidated! This is not rocket science: it is a very simple DIY project. Conveniently inside or on the back of the wiring package are simple diagrams illustrating what to do. It is so simple you'll wonder why it seemed so mysterious.

So go find yourself a really cool lamp and give it a try.

Here are the basics, step-by-step:

You learn how to put your lamp together by first taking it apart!
  • If it is plugged in, unplug it and if it has a bulb in it, take it out.
  • Spread out some newspaper on a table to catch your mess.
  • Remove the felt that is typically on the bottom of ceramic or glass lamps. 
    (If you can't get it off in one piece it is very easy to replace with a piece of felt that you can glue back in place once you are done.)


  • Loosen the screws on the socket and pop it apart
  • Unscrew the wire from the socket on both sides
  • Pull the wire out of the lamp


Now that everything is apart, 
you are going to rewire it by reversing the steps you did to take it apart.

  • Push wire up thru lamp


  • Bend the edges of the wires into a hook
  • Attach the wire on each side of the socket, tighten the screw clockwise


  • Tighten the screw on the socket attachment to the lamp
  • Pull the cord back into the lamp
  • Add socket cover & snap in place
  • Re-glue bottom felt


  • add a bulb
  • plug it in and turn it on


Shazam!
You did it!
Now don't you feel like a rocket scientist?

Next time you see a really cool lamp priced really well, don't walk away from it!
Buy it, rewire it and save yourself a bunch of money 
while getting a really cool addition to your decor!


Tuesday, January 17, 2012

Retro, Vintage Wallpaper

I found some awesome vintage wallpaper at a yard sale. There were three rolls. Two were of a huge floral pattern that was flocked in gold and reminded me of an old grandma house. Just not my vintage retro style!

I bought the third one because I thought it was fun and cool. Here it is.


Crazy right? I bought the roll for ten bucks. It SCREAMS 1950-60's kitschy pad. I could just see it on the wall in a basement rec. room behind the requisite swinging bar (Pre-"Man Cave"). There are probably more than a dozen yards. I have no idea what I was going to do with it but I had to buy it.

If anyone has any great ideas for what to do with it, let me know in a comment! Thanks! Stay tuned for a blog project in the near future.

Tuesday, January 10, 2012

Lane Acclaim Surfboard Table


Here are the pictures I promised of my refinished Lane surfboard table! Wish I had that "before picture to illustrate what it looked like. Now its a beauty and I am so proud of it! 


Take a look at that dovetail detail! 
Once you've looked at this, you will always be able to spot the Lane Acclaim series of furniture.


Here is the table in the closed position.


Here is how the table swings out.


 Look at the pretty, pretty grain! Love it!


 Swinging it out...


Morale to the story: Don't let a little refinishing stand between you and a diamond in the rough!