Showing posts with label spray paint. Show all posts

Saturday, March 31, 2012

50's Blond Sewing Box Gets Re-deaux

I came across this sewing box from the 50's. It was stained "Blond" which was very typical of 50's furniture. I saw the potential to reinvent this piece into an end table with lots of storage so I took off repurposing it. Here's how I did it:


I took off the knobs and began the sanding process to remove the finish.


Love my Black & Decker Mouse Sander!


Once everything was sanded, I used KILZ 2 tinted primer to get started.


I chose to paint it black and white so I painted the body with Eggshell Black from the Home Depot.


After two coats of paint, the body was done.


In order to turn this into an end table, I needed to add legs. I found these very 50's style legs at a yard sale and went onto priming & painting mode.


Notice the plates that hold on the legs. You can put the legs in straight (example on right) or at the angle (example on left) you often see in 50's style furniture.


I used Zinsser 1-2-3 Spray Primer on the legs since you can paint right over the finish without sanding at all! Great step saver. Notice I covered the leg tips with tape so I could repaint them silver later on to match the knobs.
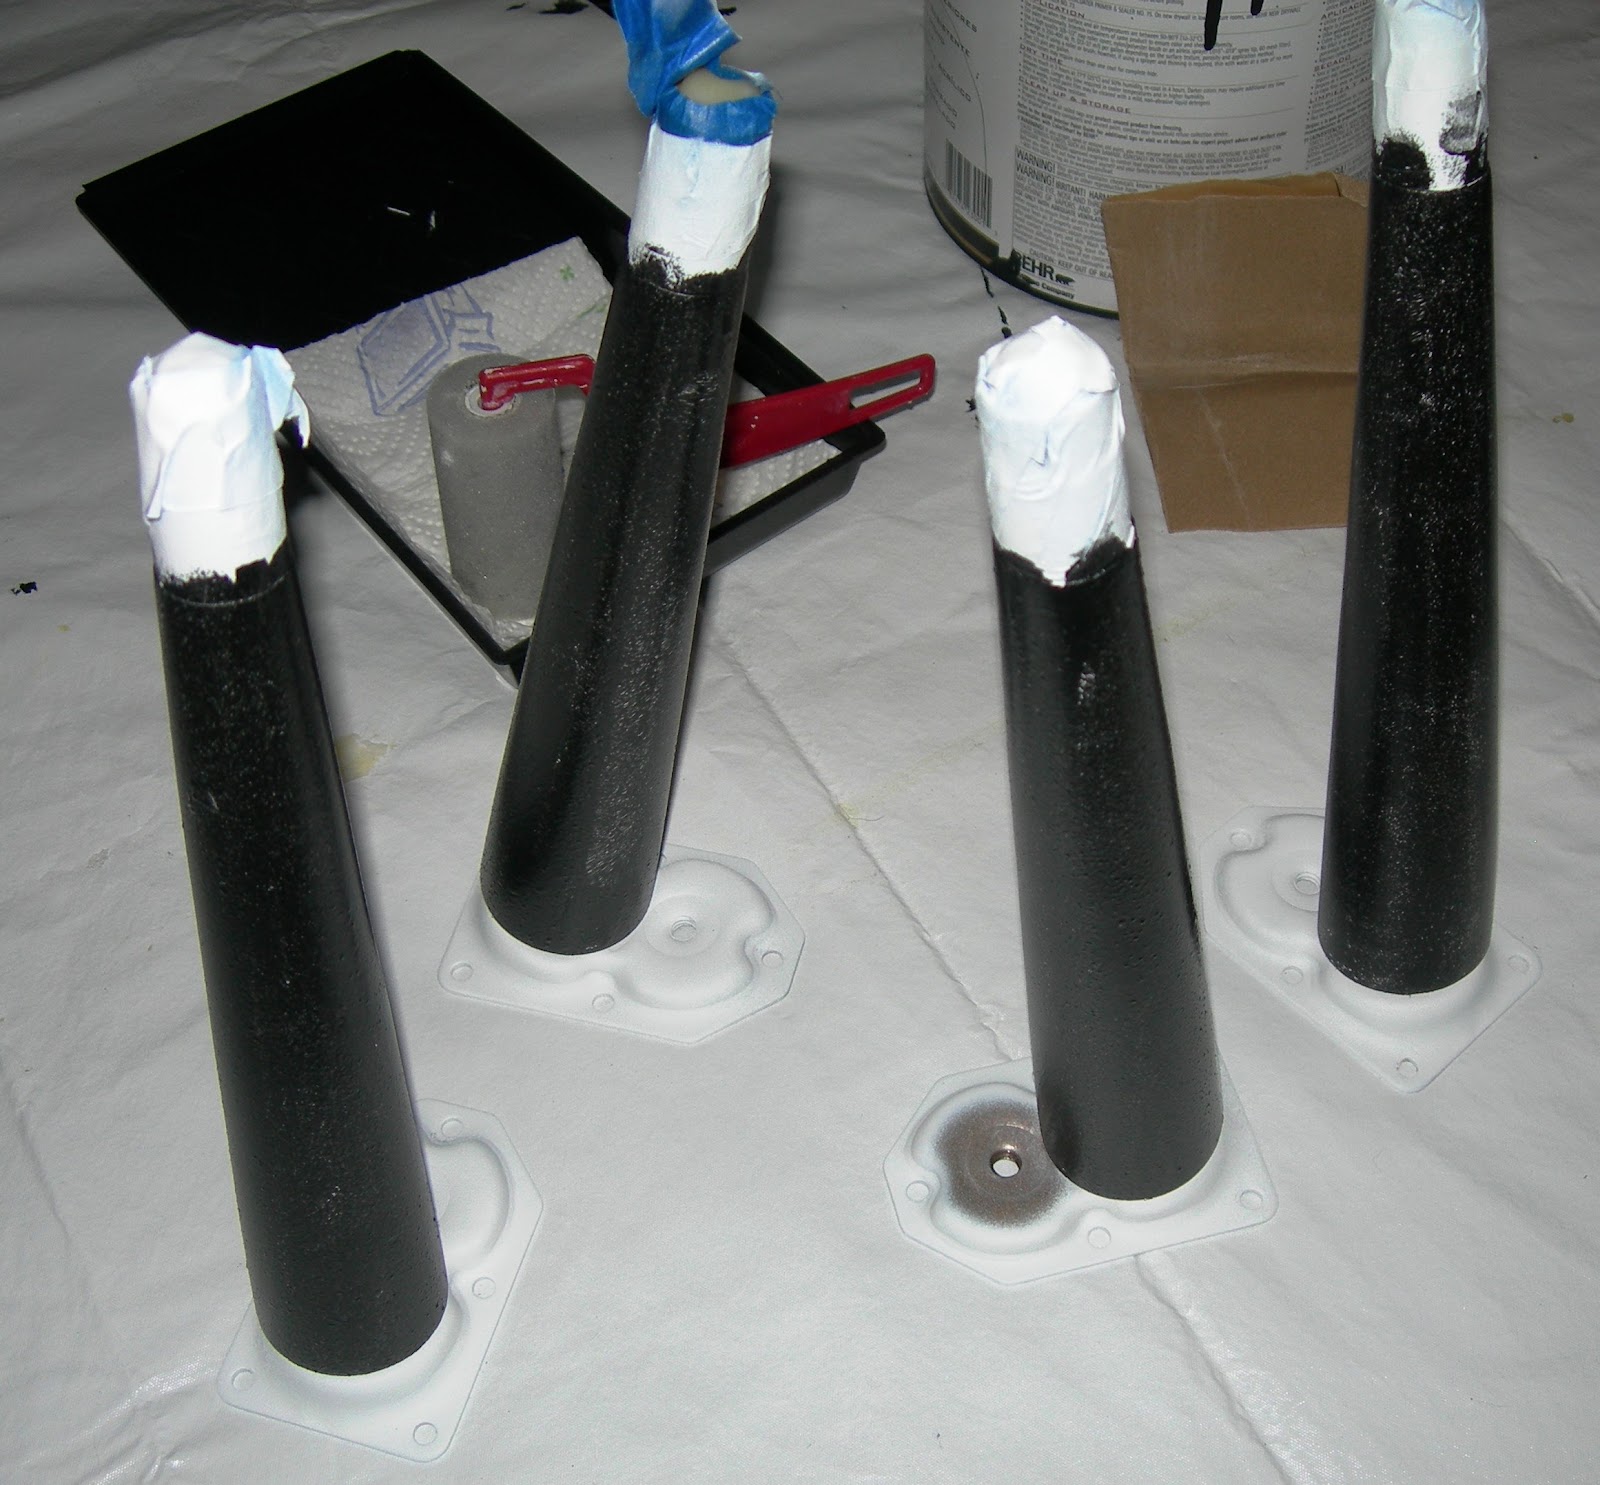

Here are the legs painted and ready to do the tips.


I took the knobs and screwed them into a piece of wood to hold them while I painted them.


I used Rust-oleum bright silver metallic finish (Can't see the cap color in the picture but it is silver!).


I sprayed the knobs and the end caps of the legs and let everything dry while I gave the drawer fronts two coats of white paint.


Here is the finished product!


BEFORE
AFTER

If you find an interesting piece but can't use it as is, consider repurposing it by adding to it and changing its purpose! 

Wednesday, March 14, 2012

A Sentimental Journey for Old Neckties

My sidekick fondly remembers her father wearing a necktie every day to go to work. He had quite a few neckties and when he passed away there were so many of them that I decided to abscond with them and do something crafty. I took a pair of ladder back chairs and wove the neckties into the seats. They flank the fireplace and are a constant reminder of him. The granddaughters who were born after he died have no memory of him. I made each of the girls a special little chair with their Grandfather's neckties as well. If you have neckties from a loved one, why not preserve his memory by turning them into a chair or stool?

Here are the basics for this project:

I see these little stools at yard sales often but the caning is usually shot. 
I got this one for this tutorial.
Pick the item you are going to use (chair, stool, etc) and give it a makeover if it is needed. 
I gave mine a coat of black spray paint since the blue wasn't going to work for me.
Weaving the ties is easy once you do a little prep work. 
Cut the fat end off the ties you will be using.
Start by sewing the first tie to itself on the underside of your stool or chair. 
(Sorry the picture isn't great!)
Next, sew each tie to the previous tie. 
Sew a few ties to each other and wrap them around and around until the top is covered. Squish them together a little and be sure you pull them tight as you wrap them around.
Once the top is covered, bring the last tie underneath, 
around the corner and up to the top to begin the weave. 
Over, under, over, under until you reach the edge.
Flip the stool over and weave the bottom as well. 
This will give you two layers of woven ties and make it more sturdy.

Be sure to pull the ties tight as you go and squish them together so the weave is tight.
Finally, when you reach the end and all the rows of ties are squished together, slip the end of the tie into the opening at the corner of the underside and hide the end. I put a couple of stitches there to keep it in place.
The finished product is useful, and if you've used the ties of a loved one, 
it can hold great sentimental value as well.


Wednesday, February 29, 2012

Vintage Kitchen Cart Makeover

I love Kitchen Carts!

I remember them from my childhood when they were a fixture in most kitchens. They provided additional storage for small appliances and often held the toaster ovens of that time. I see them pretty often at yard and estate sales but they are rarely in good shape. Due to their age and utilitarian nature, they often have rust and paint damage. You might be turned off, thinking they are shot and too rustic to be useful but let me encourage you to give them a second look. Here's one I'd like to show you as I transform it from ugly duckling to beautiful swan.


Here is the Kitchen Cart I bought.


I loved the curved handles and it was in fairly good shape, with just some minor rust.


I took it apart and got to cleaning. I used a brillo pad to clean off years of grime and attack the rusty spots. Once the clean up was done, I started the spray painting. I used Rust-Oleum Ultra Cover 2X Gloss Apple Red. This type of paint is really great for this application. 


I caution you to apply many light coats rather than one or two heavy coats. You'll get better coverage and less chance at drips or crazing. 


 Coat # 2
Subsequent coats

I do sweeping motions from one end to the other at about 10-12 inches from the surface. It takes time but its well worth it if you don't rush it. Because I was using red, it took about 1 1/2 cans of the paint to get a nice even finish. I let it cure for at least 24-48 hours before reassembling it. 


Here is the finished project! I love it and for under twenty bucks, it looks like its new again!


Rust-Oleum comes in dozens of colors so you are sure to find one that works for you. It is an easy to do project, even for beginners, and you'll end up with a useful piece of nostalgia! 
Start spraying!

Thursday, February 16, 2012

Mid-Century Mod Metal Mesh Magazine Table

There are many different varieties of mid-century metal mesh tables, shelves, and magazine racks and they are relatively inexpensive to pick up at estate or yard sales. I picked up this table with a magazine shelf at a yard sale for a couple of bucks. It was rusty and in need of a face lift but that would be no problem at all.


Have I mentioned that I love spray-paint? 
It is the quickest, easiest way to accomplish a furniture re-do! 


These metal mesh items are super easy to spray paint. I brushed off the dust and cobwebs, used a metal scrub brush to remove the rust, wiped it down and got to spray painting!

I am particularly fond of RustOleum Ultra Cover 2X spray paint. It really does a great job. You can buy cheaper paint but you really get what you pay for and this stuff is well worth it. 


I like to do a couple of light coats to avoid drips. I'm just as impatient the next guy so using the RustOleum Ultra Cover 2X is a great choice because it is fast drying. 

 Here is the transformation! 

This was a quick afternoon project. 
It reminded me just how much I love spray paint.
Oh, and instant gratification - I love that too!